
Flightradar24といえば飛行中の航空機の位置を見ることができるサービスですが、無料のBasicプランだと広告やセッションのタイムアウトがあったり、機能制限があり使いづらい部分があります。
これらの制限がない最上位のBusinessプランは月払いだと年間で600ドルかかります。円安の現在だと約9万円ほどかかってしまう計算となります。

しかし、Flightradar24では後述する航空機の情報をフィードすることで、このBusinessプランを利用できるようになります。
今回はRaspberry Piを使って航空機の位置情報をFlightradar24に送信(フィード)し、このBusinessプランを利用していきます。
材料費は15,000円程度となり、通常のBusinessプランを利用する場合と比べ75,000円の差が生まれます。さらに、長く使えば使うほどお得になる計算です。
Flightradar24の仕組み
Flightradar24では、航空機が自ら発しているADS-B信号を世界各地の受信機で受信し、Flightradar24のサーバーに集約することで各航空機の位置情報を表示しています。
このADS-B信号には航空機が自分で測位した位置情報や、昇降率などの速度、機体情報が含まれています。
データの暗号化などは特にされていないため、受信設備を構築することで誰でも発信されたデータを取得することができます。
この仕組みで世界の航空機をカバーするには、より多くの場所に受信設備が配置されている必要があります。Flightradar24はADS-Bの受信ネットワークに参加したユーザーに対してBusinessプランを提供しています。
買うもの
主にRaspberry PiとADS-Bを受信するための受信機、アンテナを買います。
今回は全てAmazonで購入しました。
| 商品 | 価格 |
|---|---|
| 電源アダプター | 1280 |
| Anker SDカードリーダー | 990 |
| Raspberry Pi Zero ケース | 1,280 |
| Raspberry Pi Zero 2 W | 3,500 |
| SDR 受信機 Nooelec R820T | 6,095 |
| USB TypeB to TypeA変換コネクタ | 933 |
| 16GB SDカード | 550 |
ここでは外付けのSDカードリーダーも買いました。
SDR受信機はNooelec社のものを購入しました。他のFlightradar24ユーザーも利用しており、アンテナも付属しているという点で購入を決めています。
セットアップ
Raspberry Pi OSのインストール
まずはSDカードにOSを焼いていきます。
下記からRaspberry Pi Imagerをダウンロードし、Raspberry Pi OSのイメージをSDカードに書き込んでいきます。
https://www.raspberrypi.com/software/
https://www.flightradar24.com/build-your-own
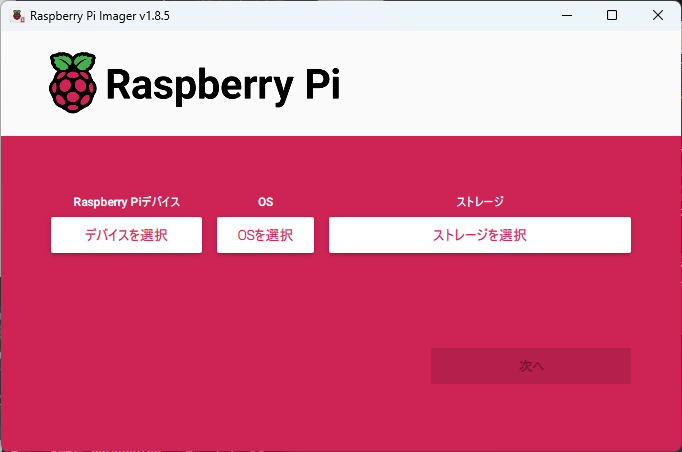
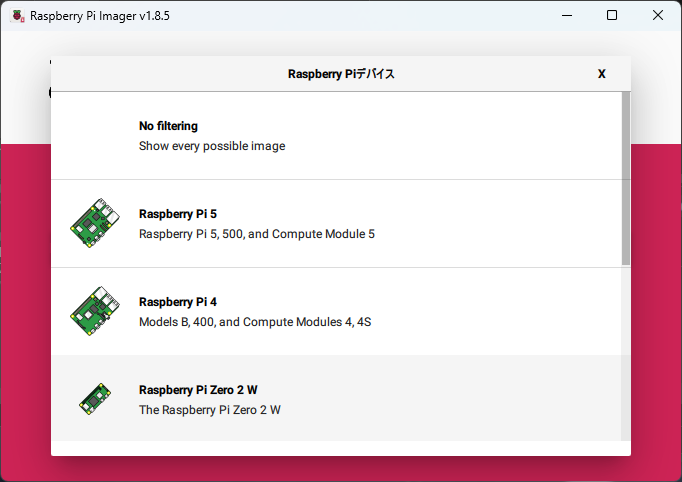
左から順に項目を指定していきます。まずはデバイスです。
今回買ったRaspberry Pi Zeroを指定します。
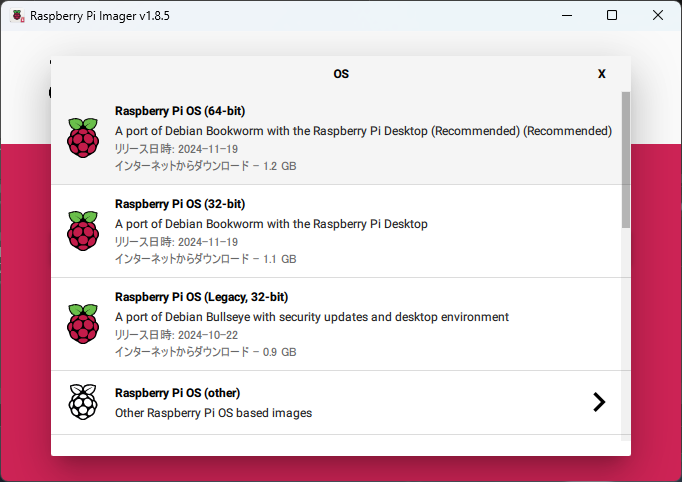
次にOSです。今回はデスクトップ環境は不要なので、 Raspberry Pi OS (other) > Raspberry Pi OS Lite (64-bit) の順に選択します。
続いてストレージを指定します。
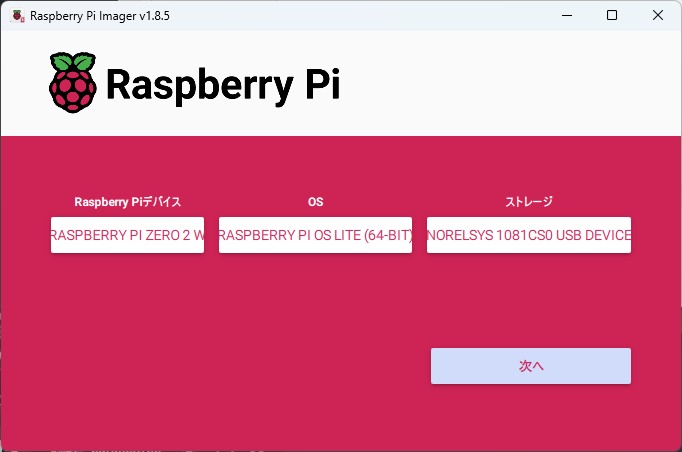
デバイス、OS、ストレージの設定ができたら「次へ」をクリックします。

Would you like to apply OS customization settings? と聞かれるので、「設定を編集する」を選択しカスタマイズ画面を開きます。
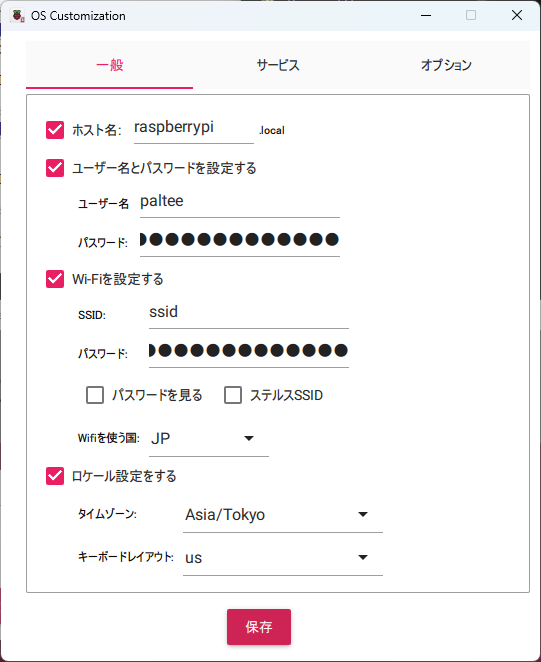
Raspberry Piを使うのは数年ぶりなのですが、今はwpa_supplicant.confに記載した認証情報でWi-Fiルーターに接続することができなくなっていたんですね。
https://qiita.com/bohemian916/items/e164e8ce37d33b1d02ee
代わりにこの設定画面でWi-Fi設定を行います。
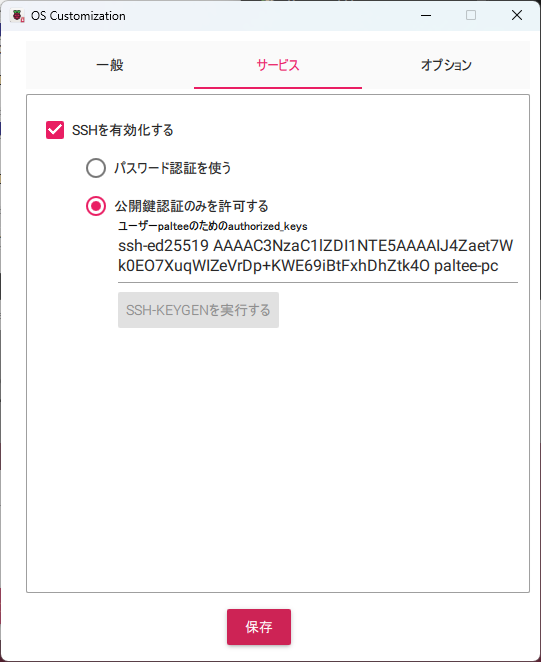
続けて「サービス」タブでSSHの設定もしておきます。
設定ができたら「保存」をクリックし、Would you like to apply OS customization settings? は「はい」をクリックします。
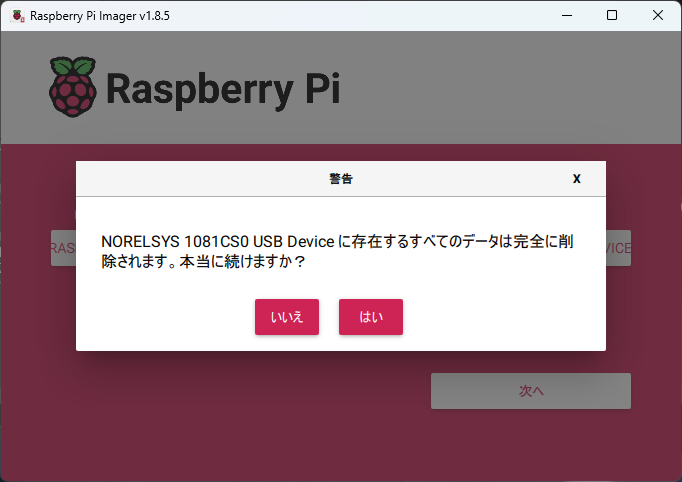
データの削除確認がされるので、「はい」をクリックします。
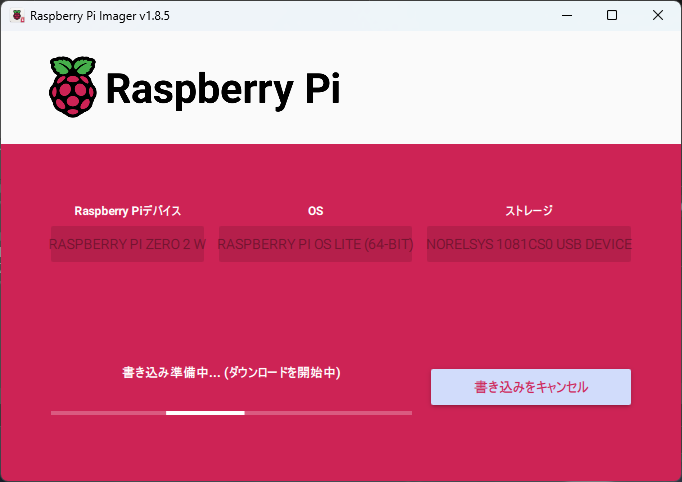
SDカードへの書き込みが始まるので完了を待ちます。
接続確認
最初にRaspberry PiにSSH接続できることを確認するため、電源ケーブルをRaspberry Piに接続し電源を入れます。
自宅で使っているAtermのルーターではどのIPアドレスにどの機器が割り当てられているか確認できるので、今回はルーターの設定画面上でIPアドレスを確認しました。
IPアドレスを確認したら、TeraTermやputtyなどのSSHクライアントを使ってRaspberry PiにSSH接続できることを確認します。
SSH接続を確認できたら一度電源を落としておきます。
受信機のセットアップ
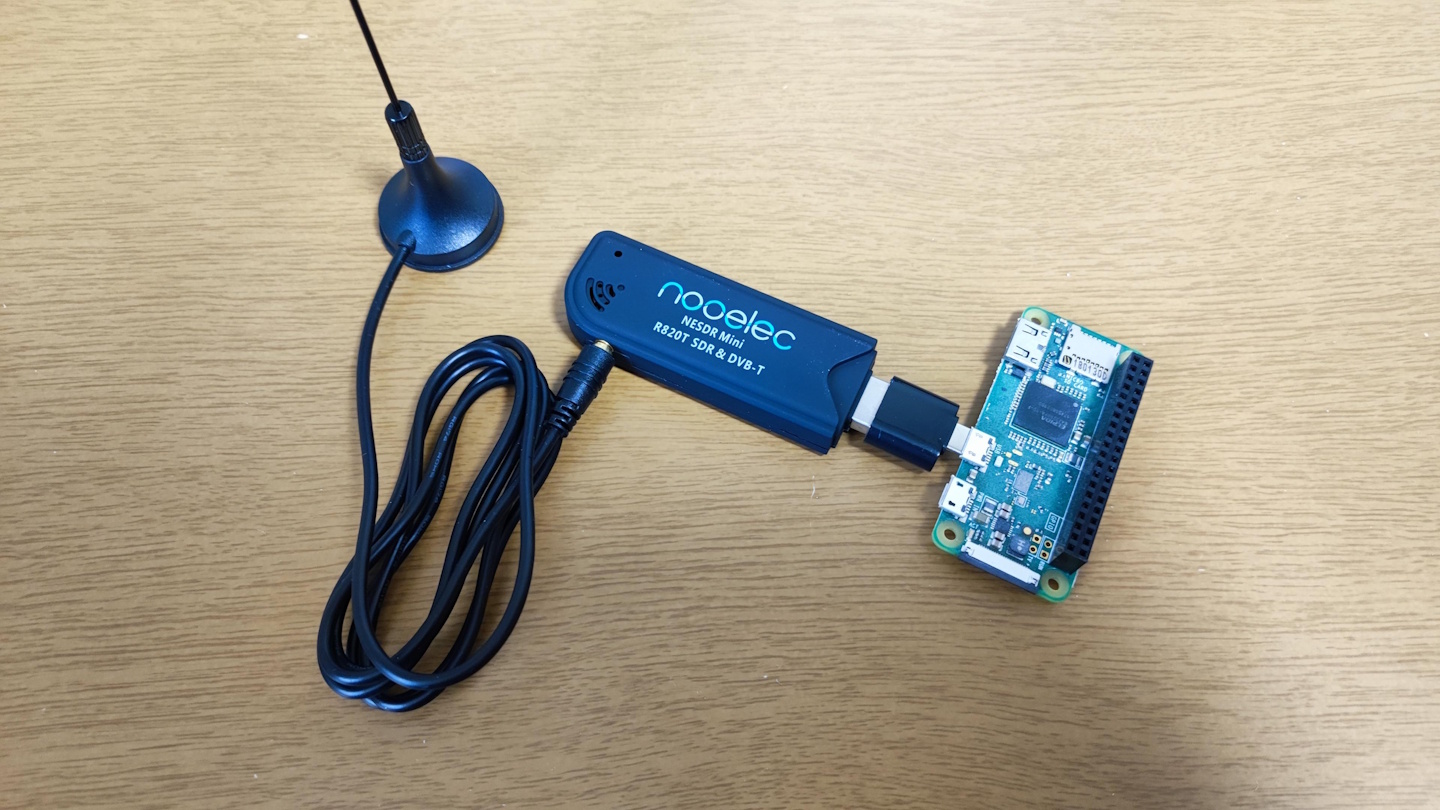
写真のようにRaspberry Piにチューナーとアンテナを接続します。
窓際など上空が開けた場所にRaspberry Piを設置し、電源を入れます。
Raspberry PiにSSH接続し、以下のインストールスクリプトを実行していきます。
$ wget -qO- https://fr24.com/install.sh | sudo bash -sGet:1 http://raspbian.raspberrypi.com/raspbian bookworm InRelease [15.0 kB]
Get:2 http://archive.raspberrypi.com/debian bookworm InRelease [39.3 kB]
Get:3 http://raspbian.raspberrypi.com/raspbian bookworm/main armhf Packages [14.5 MB]
Get:4 http://archive.raspberrypi.com/debian bookworm/main armhf Packages [549 kB]
Get:5 http://archive.raspberrypi.com/debian bookworm/main arm64 Packages [520 kB]
Fetched 15.6 MB in 38s (414 kB/s)
Reading package lists... Done
W: http://raspbian.raspberrypi.com/raspbian/dists/bookworm/InRelease: Key is stored in legacy trusted.gpg keyring (/etc/apt/trusted.gpg), see the DEPRECATION section in apt-key(8) for details.
Reading package lists... Done
Building dependency tree... Done
Reading state information... Done
dirmngr is already the newest version (2.2.40-1.1).
0 upgraded, 0 newly installed, 0 to remove and 18 not upgraded.
--2025-01-01 17:34:37-- https://repo-feed.flightradar24.com/flightradar24.pub
Resolving repo-feed.flightradar24.com (repo-feed.flightradar24.com)... 2606:4700::6812:6170, 2606:4700::6812:6270, 104.18.98.112, ...
Connecting to repo-feed.flightradar24.com (repo-feed.flightradar24.com)|2606:4700::6812:6170|:443... connected.
HTTP request sent, awaiting response... 200 OK
Length: 5287 (5.2K) [application/x-mspublisher]
Saving to: ‘STDOUT’
- 100%[==============================>] 5.16K --.-KB/s in 0.004s
2025-01-01 17:34:38 (1.25 MB/s) - written to stdout [5287/5287]
Get:1 https://repo-feed.flightradar24.com flightradar24 InRelease [17.1 kB]
Hit:2 http://raspbian.raspberrypi.com/raspbian bookworm InRelease
Hit:3 http://archive.raspberrypi.com/debian bookworm InRelease
Get:4 https://repo-feed.flightradar24.com flightradar24/raspberrypi-stable arm64 Packages [649B]
Get:5 https://repo-feed.flightradar24.com flightradar24/raspberrypi-stable armhf Packages [651B]
Fetched 18.4 kB in 5s (4,081 B/s)
Reading package lists... Done
W: http://raspbian.raspberrypi.com/raspbian/dists/bookworm/InRelease: Key is stored in legacy trusted.gpg keyring (/etc/apt/trusted.gpg), see the DEPRECATION section in apt-key(8) for details.
Reading package lists... Done
Building dependency tree... Done
Reading state information... Done
The following NEW packages will be installed:
fr24feed
0 upgraded, 1 newly installed, 0 to remove and 18 not upgraded.
Need to get 4,842 kB of archives.
After this operation, 13.7 MB of additional disk space will be used.
Get:1 https://repo-feed.flightradar24.com flightradar24/raspberrypi-stable armhf fr24feed armhf 1.0.48-0 [4,842 kB]
Fetched 4,842 kB in 3s (1,608 kB/s)
Selecting previously unselected package fr24feed.
(Reading database ... 63714 files and directories currently installed.)
Preparing to unpack .../fr24feed_1.0.48-0_armhf.deb ...
Unpacking fr24feed (1.0.48-0) ...
Setting up fr24feed (1.0.48-0) ...
You don't seem to have any dump1090 installed. Dump1090-mutability will be automatically installed upon start if DVBT receiver is chosen.
______ _ _ _ _ _ _____ ___
| ___|| |(_) | | | | | | / __ \ / |
| |_ | | _ __ _ | |__ | |_ _ __ __ _ __| | __ _ _ __`' / /' / /| |
| _| | || | / _ || '_ \ | __|| '__|/ _ | / _ | / _ || '__| / / / /_| |
| | | || || (_| || | | || |_ | | | (_| || (_| || (_| || | ./ /___\___ |
\_| |_||_| \__, ||_| |_| \__||_| \__,_| \__,_| \__,_||_| \_____/ |_/
__/ |
|___/
[main][i]FR24 Feeder/Decoder
[main][i]Version: 1.0.48-0/generic
[main][i]Built on Apr 10 2024 08:15:14 (T202404100803/Linux/static_armel)
[main][i]Running on: raspbian="12"
[main][i]Local IP(s): 192.168.0.22,240f:61:db0a:1:3218:939c:bb93:dba1,fe80::d65b:99b9:8a98:102a
[main][i]Copyright 2012-2024 Flightradar24 AB
[main][i]https://www.flightradar24.com
[main][i]DNS mode: PING
Welcome to the FR24 Decoder/Feeder sign up wizard!
Before you continue please make sure that:
1 - Your ADS-B receiver is connected to this computer or is accessible over network
2 - You know your antenna's latitude/longitude up to 4 decimal points and the altitude in feet
3 - You have a working email address that will be used to contact you
4 - fr24feed service is stopped. If not, please run: sudo systemctl stop fr24feed
To terminate - press Ctrl+C at any pointまずはFlightradar24に登録したメールアドレスを入力します。
Step 1.1 - Enter your email address ([email protected])
$:<メールアドレスを入力>
既存のSharing Keyがあれば入力するように表示されますが、今回が初回のためスキップします。
Step 1.2 - If you used to feed FR24 with ADS-B data before, enter your sharing key.
If you don't remember your sharing key, you can find it in your account on the website under "My data sharing".


Enter your sharing key or press ENTER/RETURN to continue.
$:
MLATの計算に参加するか聞かれるので回答します。
Step 1.3 - Would you like to participate in MLAT calculations? (yes/no)$:yes

IMPORTANT: For MLAT calculations the antenna's location should be entered very precise!
受信機の緯度、経度、高度を入力します。
Step 3.A - Enter antenna's latitude (DD.DDDD)
$:XXX.XXXX
Invalid latitude: XXX.XXXX, please try again!

Step 3.A - Enter antenna's latitude (DD.DDDD)
$:XX.XXXX

Step 3.B - Enter antenna's longitude (DDD.DDDD)
$:XXX.XXXX

Step 3.C - Enter antenna's altitude above the sea level (in feet)
$:XX

Using latitude: XX.XXXX, longitude:XXX.XXXX, altitude: XXft above sea level

Validating email/location information...OK

The closest airport found is ICAO:RJTU IATA:QUT near .

Latitude: XX.XXXXXX
Longitude: XXX.XXXXXX
Country: Japan

Flightradar24 may, if needed, use your email address to contact you regarding your data feed.

Would you like to continue using these settings?
Enter your choice (yes/no)$:yes受信機の種別を指定します。今回はDVBT Stickとなります。
Step 4.1 - Receiver selection (in order to run MLAT please use DVB-T stick with dump1090 utility bundled with fr24feed):

 1 - DVBT Stick (USB)
 -----------------------------------------------------
 2 - SBS1/SBS1er (USB/Network)
 3 - SBS3 (USB/Network)
 4 - ModeS Beast (USB/Network)
 5 - AVR Compatible (DVBT over network, etc)
 6 - microADSB (USB/Network)

Enter your receiver type (1-6)$:1
Checking for dump1090...NOT FOUND

Step 4.3 - Enter your additional dump1090 arguments or leave empty
$:
生データのフィードを有効にするか聞かれるので回答します。特に必要なければnoで良いでしょう。
Step 5.1 - Would you like to enable RAW data feed on port 30002 (yes/*no*)$: no

Step 5.2 - Would you like to enable Basestation data feed on port 30003 (yes/no)$: no

Submitting form data...OK
以上のセットアップが終わると、フィーダーのシステムが起動します。
Congratulations! You are now registered and ready to share ADS-B data with Flightradar24.
+ Your sharing key (XXXX) has been configured and emailed to you for backup purposes.
+ Your radar id is T-XXXX, please include it in all email communication with us.
+ Please make sure to start sharing data within one month from now as otherwise your ID/KEY will be deleted.

Thank you for supporting Flightradar24! We hope that you will enjoy our Premium services that will be available to you when you become an active feeder.

To start sending data now please start the fr24feed daemon again by running the following command: sudo systemctl start fr24feed!

Saving settings to /etc/fr24feed.ini...OK
Settings saved, attempting to enable and start the fr24feed service
Enabled fr24feed service...OK
Failed to restart fr24feed service!
paltee@raspberrypi:~ $ sudo systemctl status fr24feed
● fr24feed.service - Flightradar24 Decoder & Feeder
     Loaded: loaded (/etc/systemd/system/fr24feed.service; enabled; preset: enabled)
     Active: activating (start-pre) since Wed 2025-01-01 17:44:05 JST; 8s ago
  Cntrl PID: 1609 (install_dump109)
      Tasks: 3 (limit: 387)
        CPU: 7.586s
     CGroup: /system.slice/fr24feed.service
             ├─1609 /bin/bash /usr/lib/fr24/install_dump1090.sh
             ├─1610 tee -a /var/log/fr24feed_install_dump1090.log
             ├─1619 apt-get update -y
             └─1786 /usr/bin/dpkg --print-foreign-architectures
セットアップが終わったら、ブラウザで http://<Raspberry PiのIPアドレス>:8754 にアクセスし、以下のようなページが表示されることを確認します。
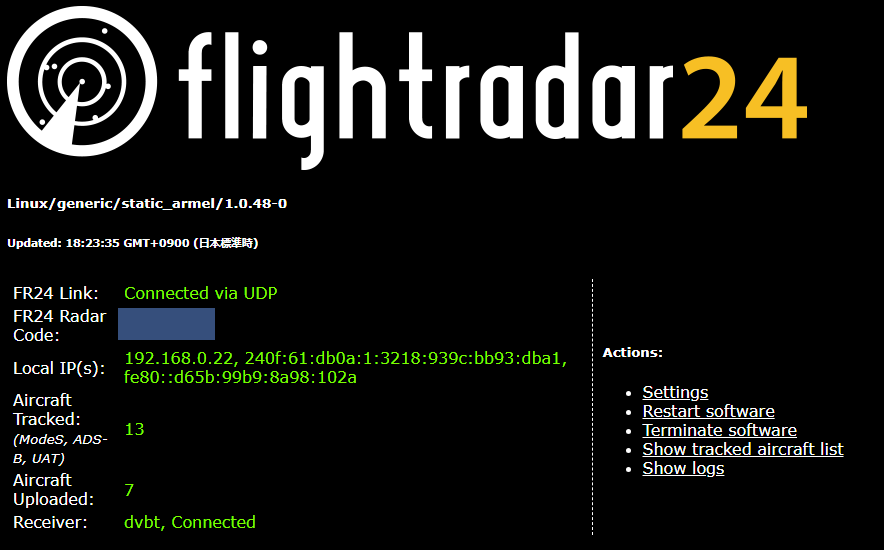
ここでは以下を確認します。
- FR24 Link:
Connectedであること - Receiver:
Connectedであること
正常に接続できていれば受信したADS-BのデータがFlightradar24に送信されます。
しばらく経過すると、Flightradar24のプランがBusinessにアップグレードされます!
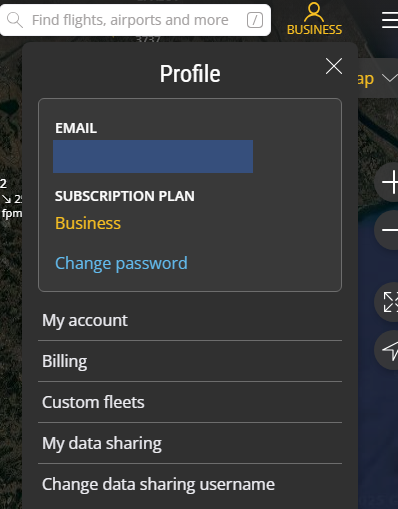
また、メニューにMy data sharingの項目が追加されます。
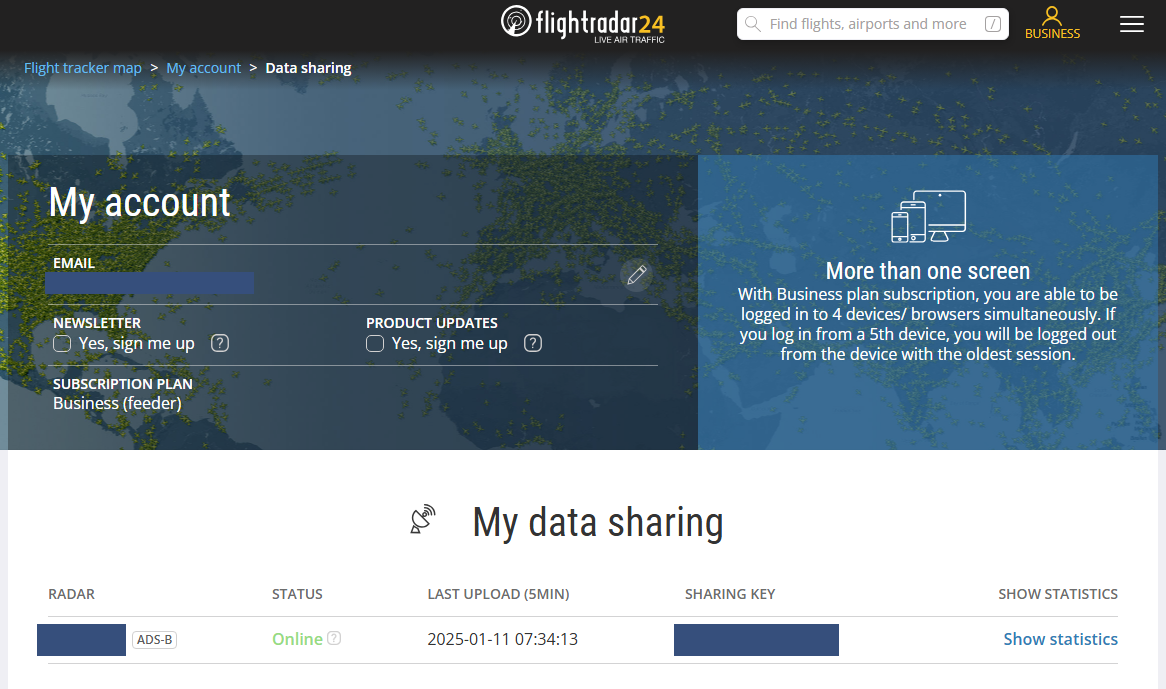
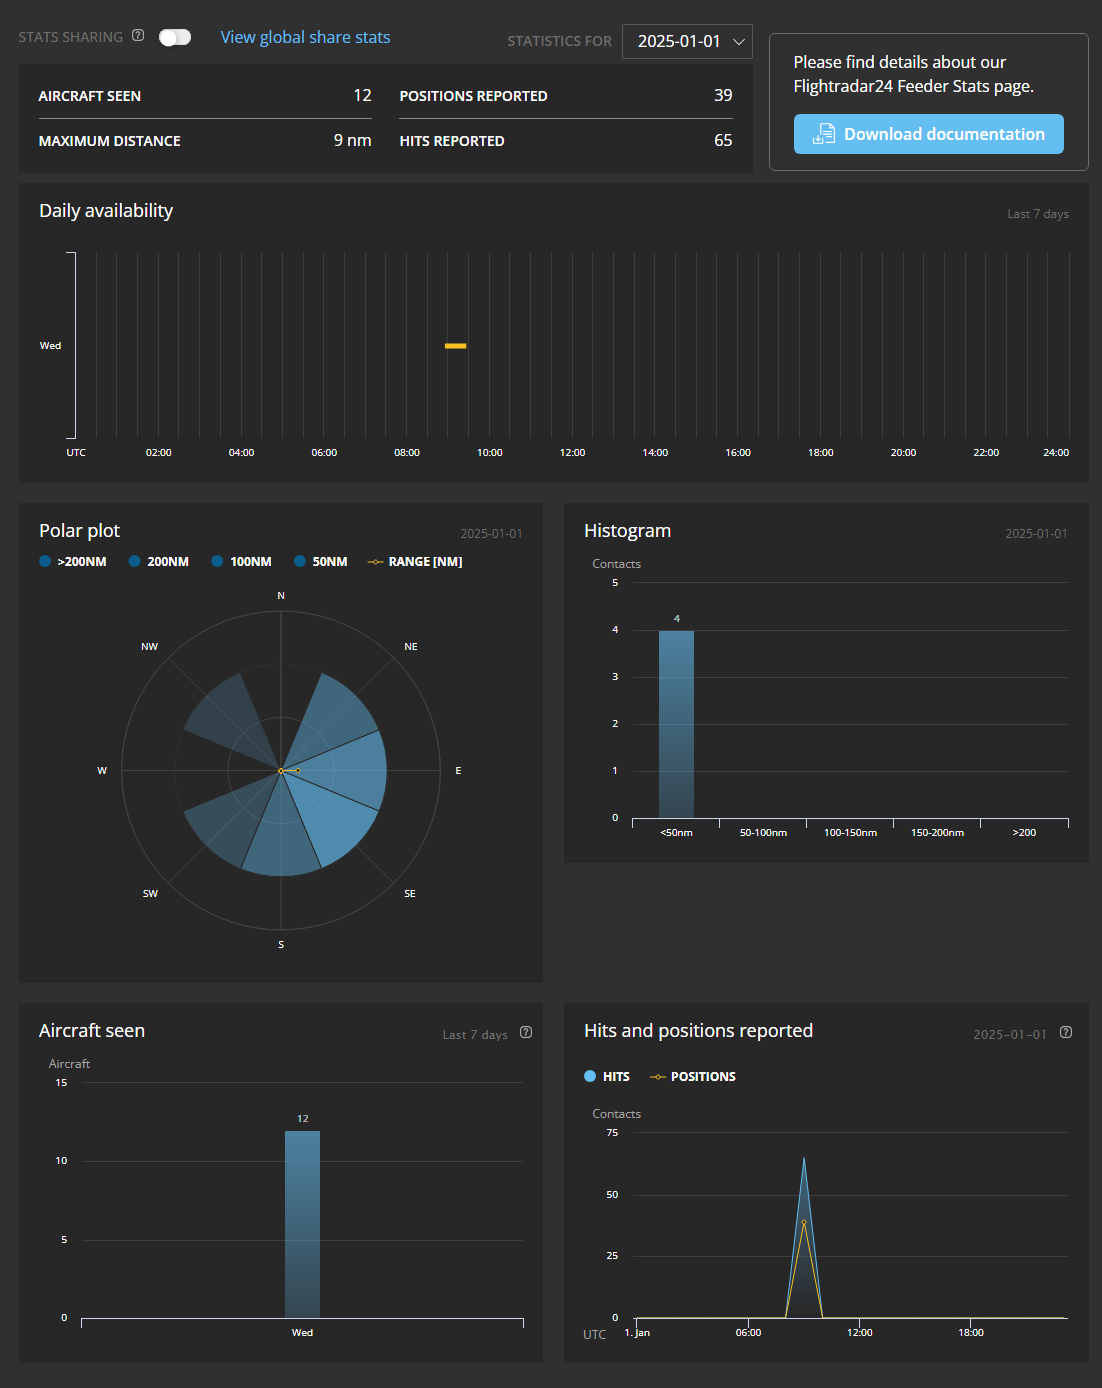
Show statisticsからその受信機で受信した航空機の情報の数や方位といった情報を確認することができます。
Businessプランでできること
最後にBusinessプランで使える機能で便利だと感じた機能を紹介します。
機体のラベル項目追加
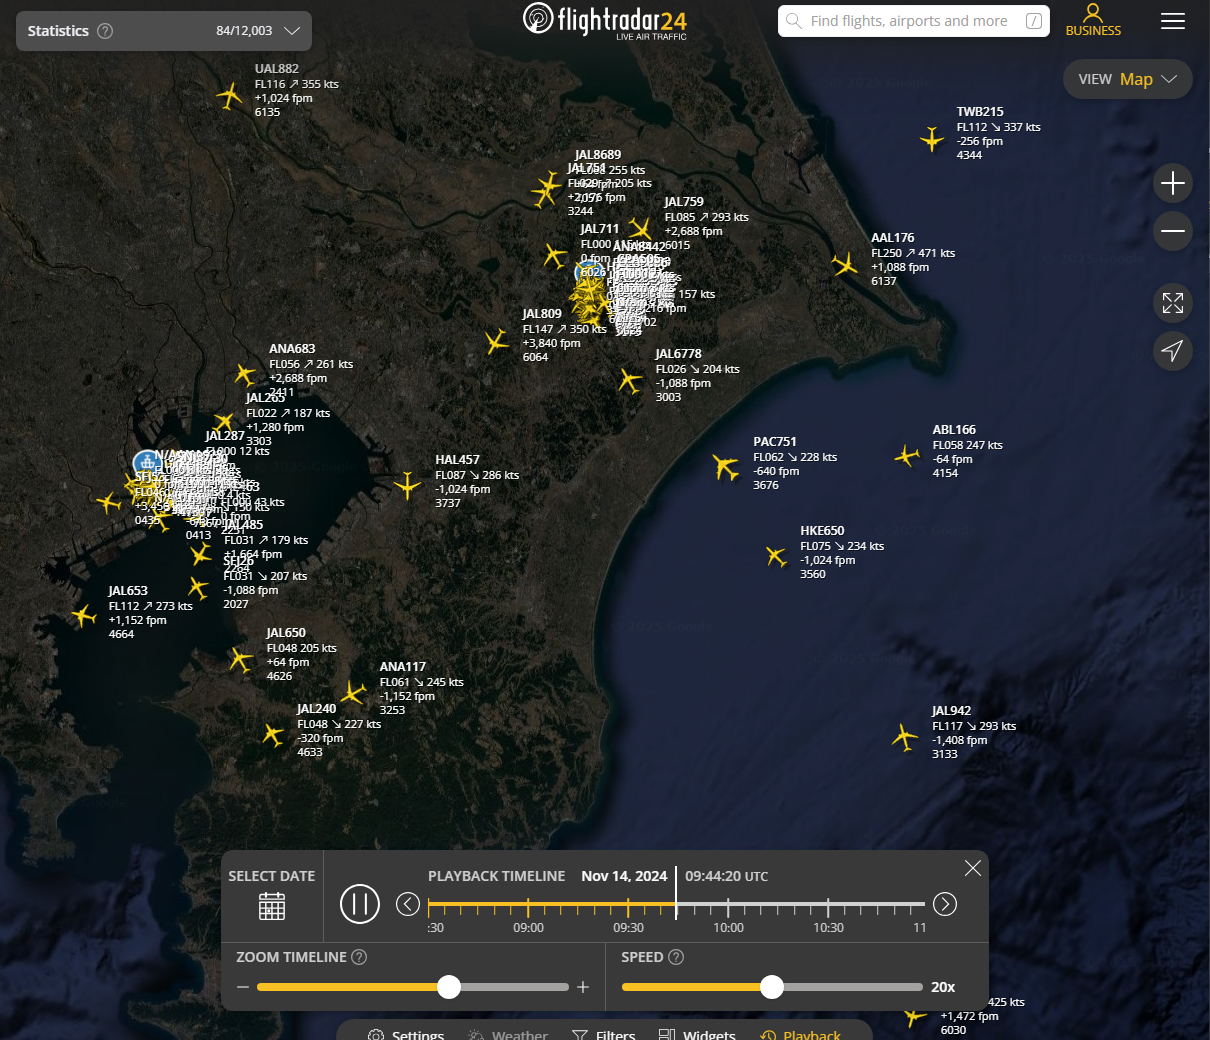
Settings > Mapタブ > AIRCRAFT LABELSからマップ上の機体に表示する情報を増やすことができます。
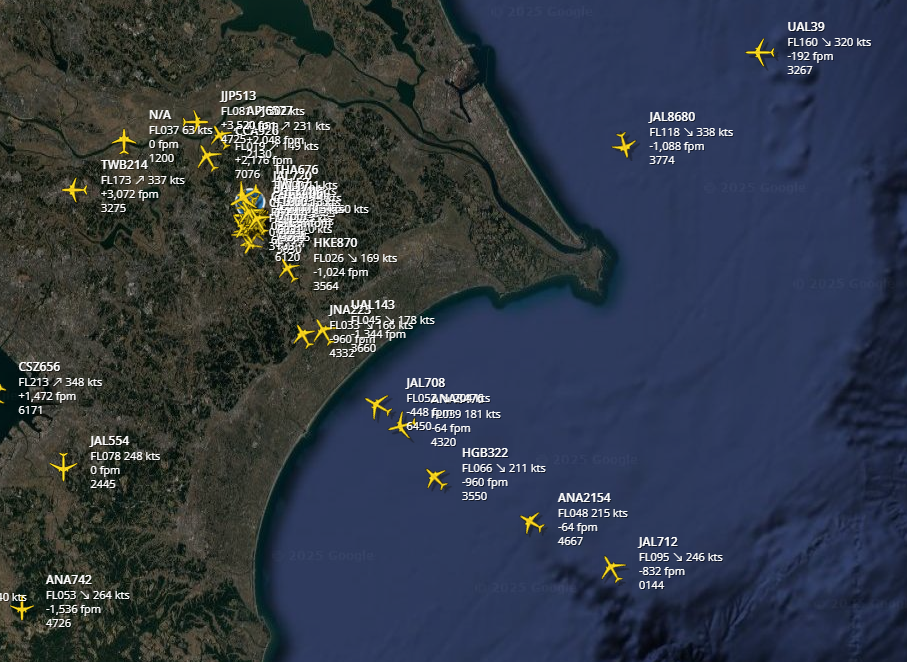
自分は以下のようにコールサイン、フライトレベル、昇降率、スコークを表示しています。
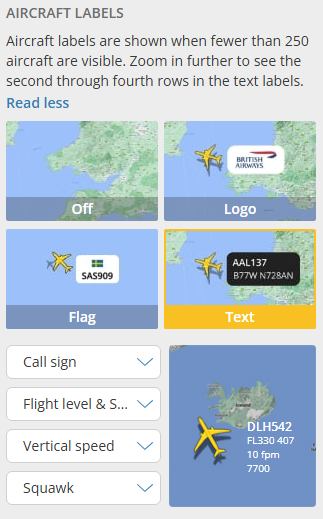
各機体の移動に関する情報が見えるようになり、一目で把握しやすくなりました。
Radar View
マップ右上のメニューからRadar Viewを選択することができます。
Radar Viewでは、以下のように管制レーダーを模したマップを表示することができます。
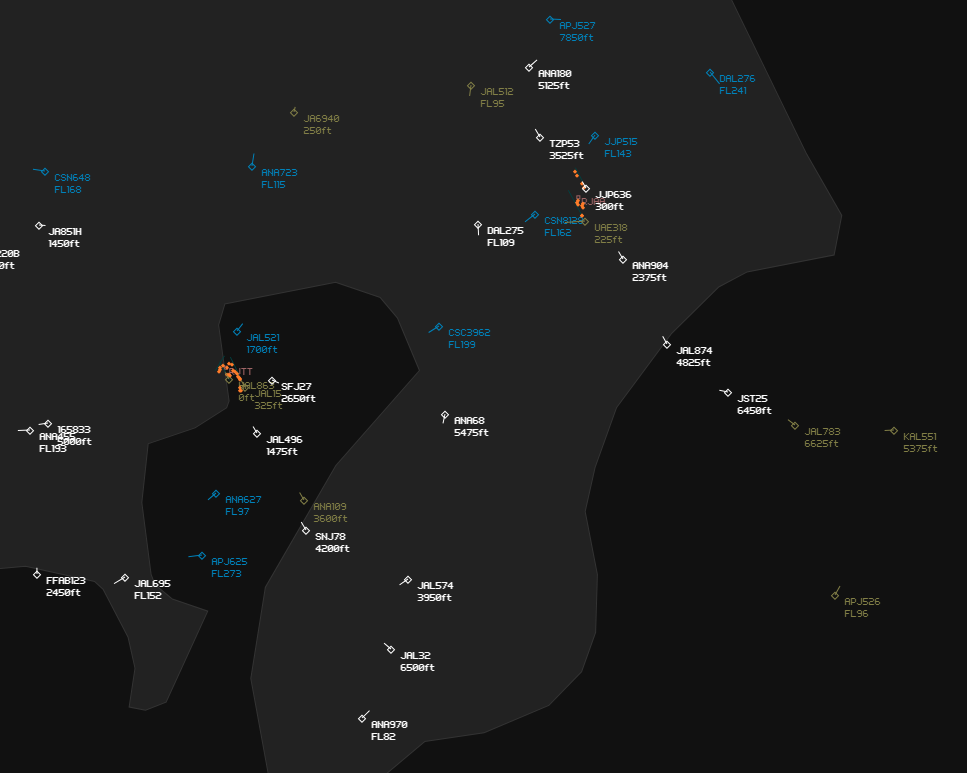
通常のマップと比べ機体の描画がコンパクトにされる点はより見やすく、方位、速度も図示されるようになる点も良かったです。
過去ログの表示
通常は1週間しか遡れないフライト履歴が3年前まで遡れるようになります。
Playback機能を使うと過去のある時点での飛行状況を確認できるので便利です。
おわりに
Flightradar24のフィーダーになることでBusinessプランを利用できるようになりました。
受信状況をランキング形式で見ることができるのも面白く、よりちゃんとしたアンテナを買って屋根に設置したりできると上位を狙えそうです。